When it comes to enhancing the aesthetics of your home while also improving energy efficiency, adhesive window film is an excellent option. Whether you’re looking to add some privacy, reduce glare, or simply jazz up the look of your windows, this versatile solution offers a range of benefits. In this guide, we’ll walk you through the entire process of using adhesive window film, ensuring you achieve professional-looking results without the need for expert installation.
Adhesive window film is a thin layer of material that can be applied directly to glass surfaces. It’s available in a variety of designs, including frosted, tinted, and decorative patterns. Besides enhancing the visual appeal of your windows, adhesive window film provides practical benefits such as UV protection, heat reduction, and increased privacy.
Benefits of Window Film
- Aesthetic Enhancement: Window film comes in various designs that can complement any interior decor.
- Energy Efficiency: By blocking out UV rays and reducing heat transfer, window film helps lower energy bills.
- Privacy: Perfect for rooms that require seclusion without sacrificing natural light.
- UV Protection: Protects furniture and floors from fading by blocking harmful UV rays.
Preparing for Installation
Before diving into the installation process, it’s essential to gather the necessary materials and prepare your workspace.
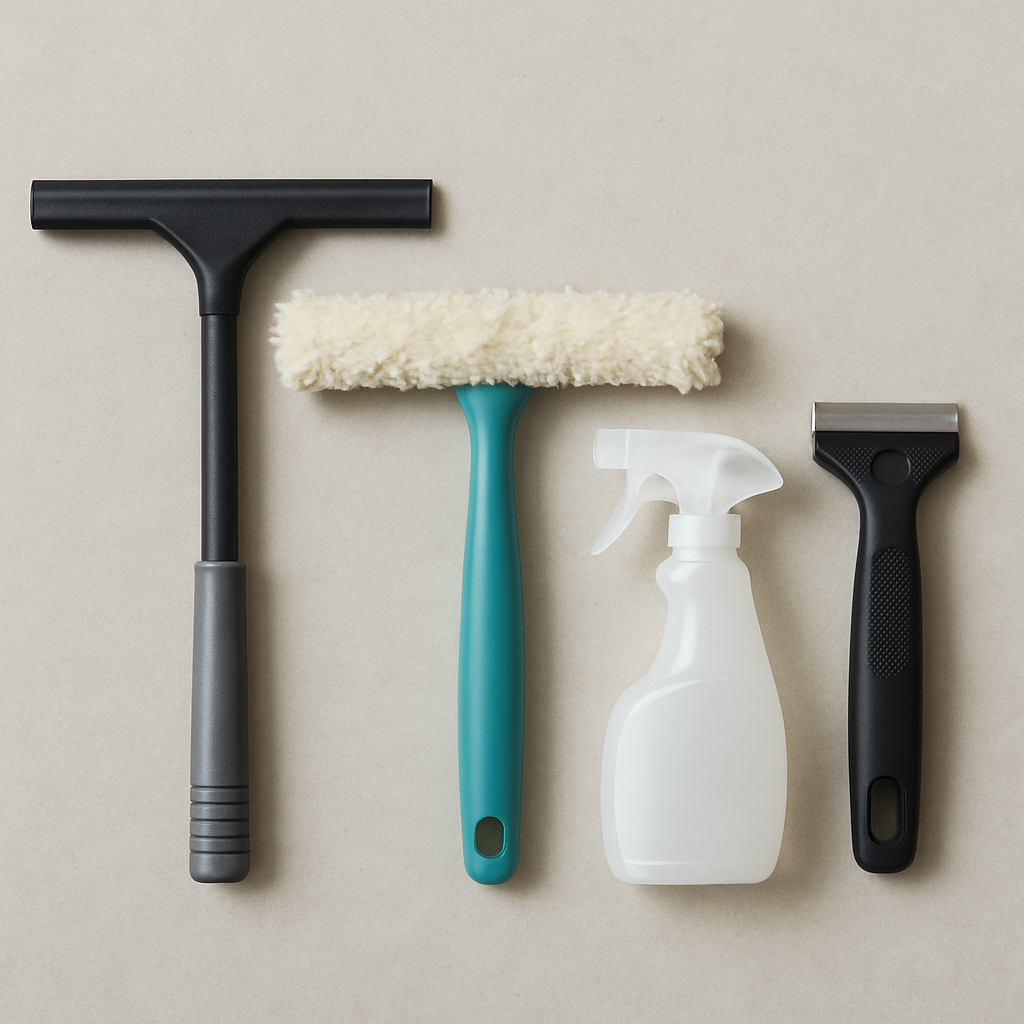
Materials Needed
- Adhesive window film
- Measuring tape
- Utility knife or scissors
- Squeegee or credit card
- Spray bottle filled with a soapy water solution
- Lint-free cloth or paper towels
Preparing the Window
- Clean the Surface: Thoroughly clean the window surface using a glass cleaner and lint-free cloth. Remove any dirt, dust, or grease to ensure the adhesive film sticks properly.
- Measure the Window: Use the measuring tape to measure the dimensions of the window. Add an extra inch to the measurements to allow for easy trimming after application.
Step-by-Step Installation Guide
With your materials ready and the window prepared, you can proceed with the installation of the adhesive window film.
Step 1: Cut the Film
Unroll the adhesive window film on a clean, flat surface. Using the measurements you took earlier, cut the film to the approximate size of the window, leaving an extra inch on all sides.
Step 2: Wet the Window
Fill a spray bottle with a soapy water solution (a few drops of dish soap in water). Generously spray the solution onto the window surface. The soapy water will help the film slide into place and prevent it from sticking before you’re ready.
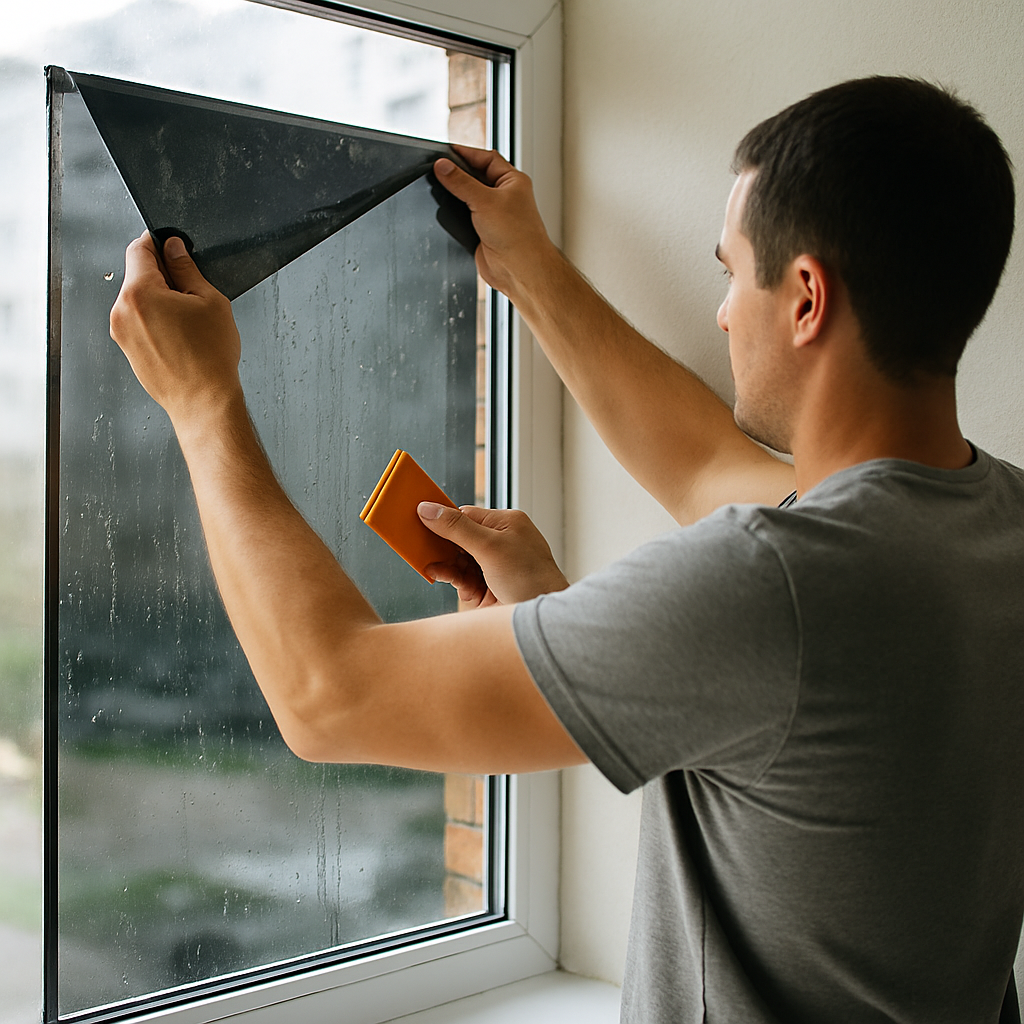
Step 3: Apply the Film
Carefully peel the backing from the adhesive window film, starting at one corner. Align the top edge of the film with the top of the window, ensuring that it is centered and aligned correctly. Gently press the film onto the glass, allowing the soapy water to hold it in place.
Step 4: Smooth Out Bubbles
Using a squeegee or a credit card wrapped in a soft cloth, smooth out any air bubbles and excess water from the center of the film toward the edges. Work slowly to prevent the film from shifting. If necessary, spray more soapy water on top of the film to facilitate the smoothing process.
Step 5: Trim the Excess Film
Once the film is smooth and in place, use a utility knife or scissors to carefully trim the excess film from the edges. Ensure the cuts are clean and precise for a professional finish.

by Will Roberts (https://unsplash.com/@brandnewextragood)
Step 6: Final Touches
Inspect the film for any remaining bubbles or imperfections. Use the squeegee to remove them gently. Allow the film to dry completely, which may take a few hours to a day, depending on the room temperature and humidity.
Maintenance and Care
To ensure the longevity and effectiveness of your adhesive window film, regular maintenance is essential.
Cleaning Tips
- Avoid Harsh Chemicals: Use a mild soap solution and a soft cloth to clean the window film. Harsh chemicals can damage the film and reduce its lifespan.
- Gentle Cleaning: Always use soft materials to avoid scratching the film. Avoid abrasive pads or brushes.
Regular Inspection
Periodically check the edges of the film for signs of peeling or bubbling. Address any issues promptly to prevent further damage.
Choosing the Right Window Film
When selecting adhesive window film, consider the specific needs and style of your space.
Types of Window Film
- Frosted Film: Offers privacy while allowing light to pass through.
- Tinted Film: Reduces glare and heat, perfect for sunny rooms.
- Decorative Film: Adds artistic flair with patterns and colors.
- Security Film: Provides an additional layer of protection against break-ins and accidents.
Matching Interior Design
Choose a film that complements the overall aesthetic of your home. Whether you prefer subtle elegance or bold patterns, there’s a film to match every style.
Conclusion
Adhesive window film is a cost-effective, versatile solution for enhancing both the appearance and functionality of your windows. By following this step-by-step guide, you can achieve professional-looking results that improve privacy, reduce energy costs, and protect your interior from harmful UV rays. With the right materials and a little patience, you’ll transform your living space in no time.
Remember, the key to successful window film application lies in careful preparation and meticulous execution. With these tips, you’re well on your way to achieving a polished, stylish look that meets your unique needs. Happy decorating!