Removing residential window film can seem like a straightforward task, but it can actually be more complex than it appears. This article aims to guide you through the process, weighing the pros and cons of doing it yourself versus hiring a professional.
Window film serves various purposes, from enhancing privacy to improving energy efficiency by blocking harmful UV rays. However, over time, the film may become outdated, damaged, or less effective, prompting the need for removal. To better understand how films work before removing them, you can learn about window films.
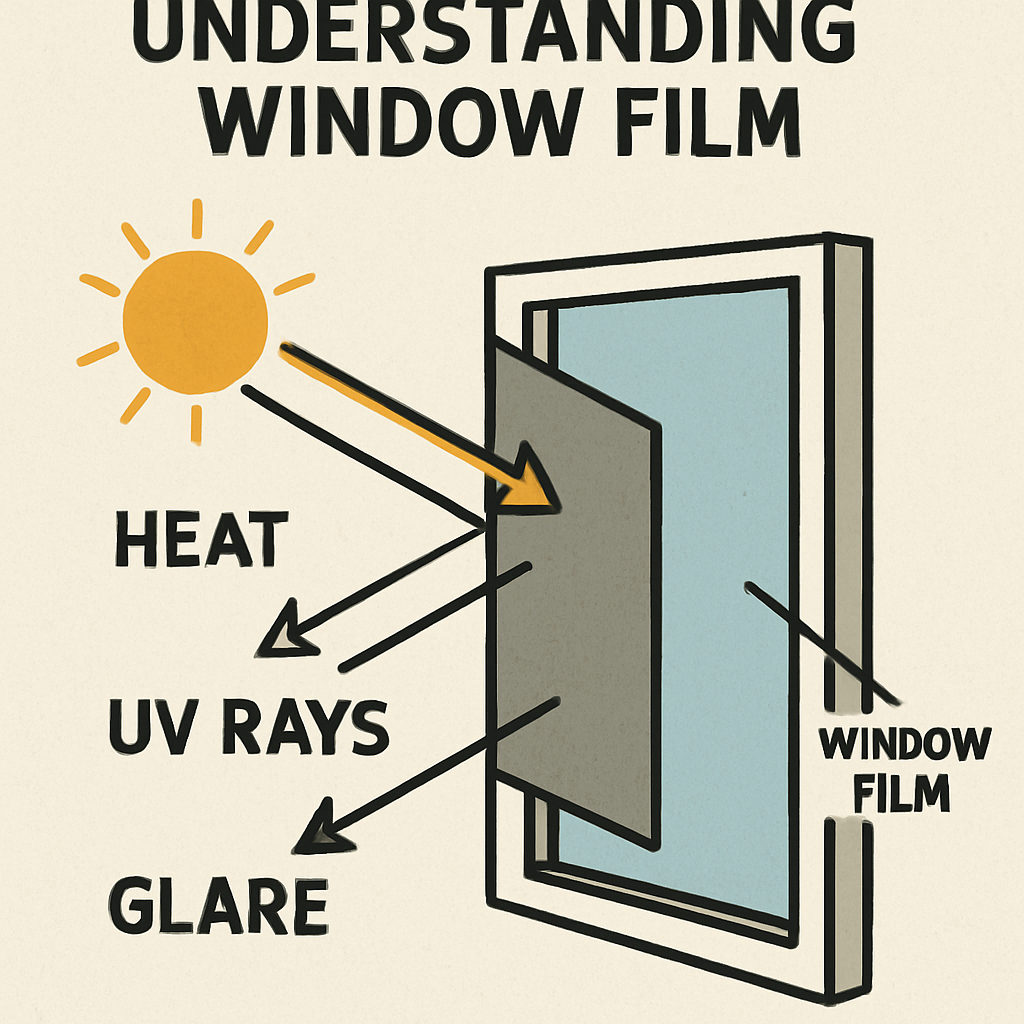
Before embarking on the removal process, it’s essential to understand what window film is and its role in your home. Window films are thin, multi-layered polyester or vinyl materials applied to the interior surface of glass windows. They serve multiple purposes, including reducing glare, blocking UV rays, and enhancing privacy. According to the U.S. Department of Energy, certain window films can significantly improve energy efficiency by reducing heat gain and loss.
Reasons for Removing Window Film
There are several reasons why you might consider removing window film:
- Aesthetic Changes: Styles change, and you may want to update the look of your home.
- Damage: Over time, films can get scratched or start to peel.
- Effectiveness: Films can degrade, reducing their ability to block UV rays or control heat.
DIY Window Film Removal
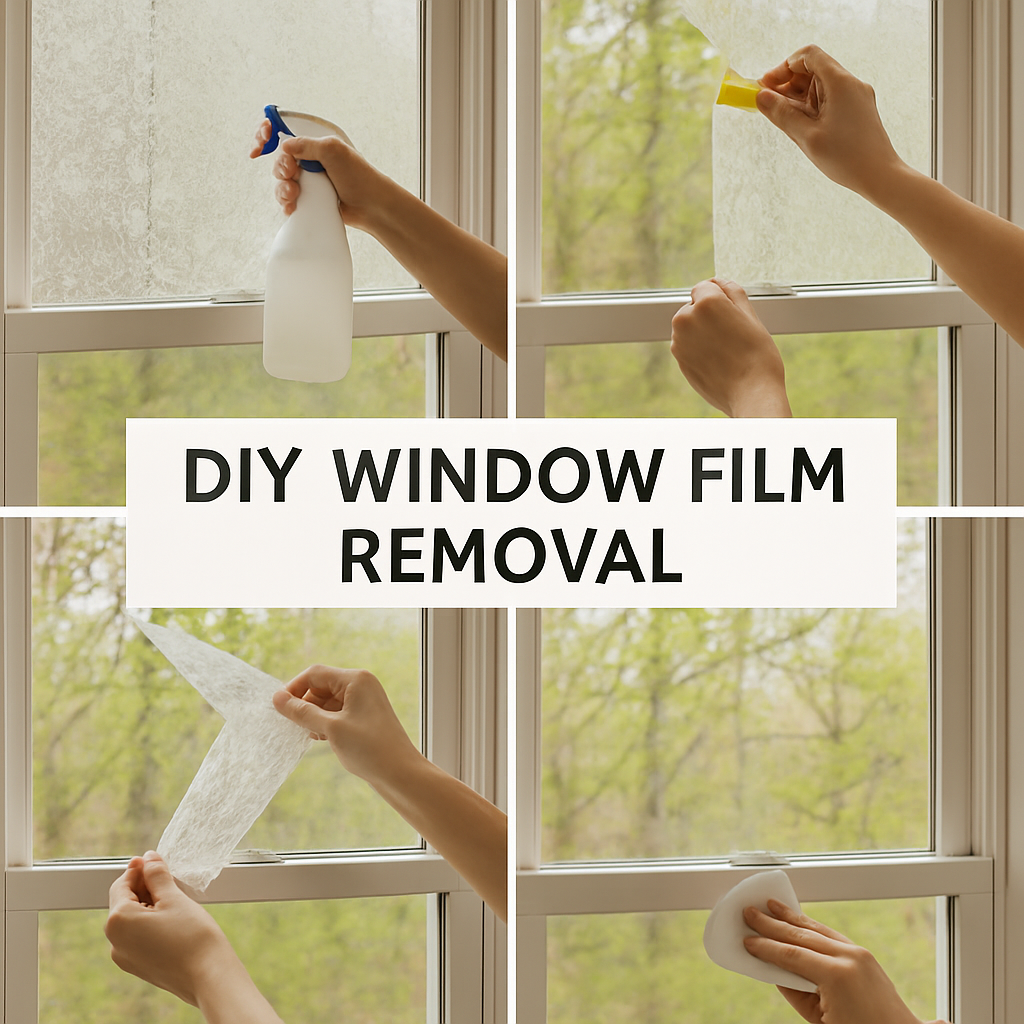
Removing window film yourself can be a cost-effective solution. It allows you to take control of the process and potentially save money. Here’s a step-by-step guide to help you through the DIY process.
Tools You Will Need
To remove window film, gather the following tools:
- A utility knife or razor blade
- A spray bottle filled with soapy water or ammonia
- A scraper or squeegee
- Paper towels or a clean cloth
- A hairdryer or heat gun
Step-by-Step Removal Process
- Soften the Adhesive: Start by spraying the soapy water or ammonia solution on the film. Let it sit for about 15-20 minutes to soften the adhesive.
- Peel the Film: Using a utility knife, gently lift a corner of the film. Slowly peel it away from the glass, applying even pressure to avoid tearing.
- Apply Heat: If the film is stubborn, use a hairdryer or heat gun to warm the adhesive. This makes it easier to peel the film without leaving residue.
- Remove Remaining Adhesive: Spray the glass again with the solution and use the scraper or squeegee to remove leftover adhesive. Wipe clean with paper towels or a cloth.
Pros of DIY Removal
- Cost-Effective: Save on professional service fees.
- Convenience: You can remove the film at your own pace and on your schedule.
Cons of DIY Removal
- Time-Consuming: The process can be labor-intensive and may take several hours.
- Risk of Damage: Improper removal techniques can scratch or damage the glass.
When to Call a Professional

by Sydney Moore (https://unsplash.com/@sydmoore6)
While DIY removal is possible, there are situations where hiring a professional is the best option.
Benefits of Professional Removal
- Expertise: Professionals have the experience and tools to remove film efficiently without damaging your windows.
- Time-Saving: A professional can complete the job quickly and effectively.
- Warranty Protection: If your windows are under warranty, removing the film yourself might void it.
Situations Requiring Professional Help
- Large Areas: Removing film from large windows or entire home sections is more manageable with professional help.
- Old or Stubborn Film: Film that has been in place for many years may require specialized tools and techniques for removal.
Safety Considerations
Before you start, consider the safety implications of removing window film. Always wear protective gloves and eyewear to avoid injury from glass or chemicals. Ensure the area is well-ventilated, especially if using ammonia, to prevent inhaling fumes. For safety guidance on handling household chemicals, consult the CDC chemical safety recommendations.
Conclusion
Removing residential window film can be a satisfying DIY project if approached with the right tools and techniques. However, for those who prefer not to take the risk or lack the time, hiring a professional ensures the job is done safely and efficiently. Ultimately, the decision comes down to your comfort level and the specific circumstances of your project.
By understanding the process, weighing the pros and cons, and considering your personal capabilities, you can make an informed choice that best suits your needs. Whatever you decide, remember that the goal is to enhance your living space while maintaining the integrity and appearance of your windows.